DIY Macrame Christmas Snowflake Tutorial (Beginner-Friendly)
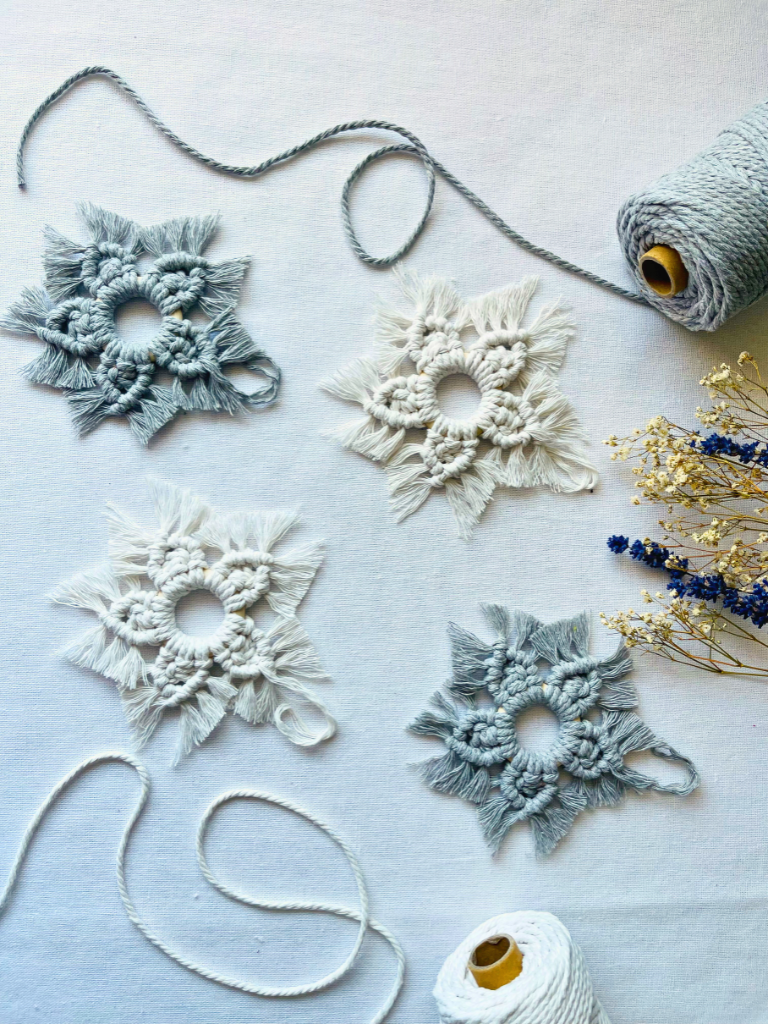
Snowflakes are magical—each one is unique, delicate, and full of charm. Today, I'm sharing one of my favorite Macrame Christmas projects: a simple snowflake ornament.
Ready to make a cozy, handmade gift? This simple macrame snowflake tutorial is perfect for your tree, as a thoughtful stocking filler, or for selling at holiday fairs.
This is a beginner-friendly tutorial that only needs a few materials and basic knots. You'll be surprised how quickly these come together!
Materials & Tools You Will Need
(Contains affiliate links)
You'll need soft, single-strand cotton cord and a small wooden or metal ring to create the central foundation.
3mm Macrame Cord: 15 × 30 cm pieces
3mm Macrame Cord: 1 × 40 cm piece (for the hanger)
Wooden or Metal Ring (40 mm): To form the center of the snowflake.
Fringe Comb
Sharp Scissors
Shop the Materials:
Cord Link: 3mm Macrame Cord: https://amzn.to/4qsiBoT
Ring Link: 40mm Wooden Ring: https://amzn.to/4oG1o9W
Tools Links:
Fringe Comb: https://amzn.to/4oFMAIk
Scissors: https://amzn.to/47rcPLA
Affiliate Disclosure: The links above are affiliate links. This means I may earn a small commission if you make a purchase through them — at no extra cost to you. Your support helps me continue creating free tutorials and improving this channel.
Key Knots to Know
This project is a great skill-builder as it requires the Diagonal Double Half Hitch Knot—the technique used to create geometric lines and shapes.
Lark's Head Knot: Used to attach cords to the ring. It provides a clean, secure base.
Square Knot: A fundamental knot used to provide structure and texture (you will use this for the central base of the arms).
Diagonal Double Half Hitch Knot (DHH): This knot is essential for creating the beautiful, angled "arms" of your snowflake.
Step-by-Step Tutorial
1. Attach the Cords to the Ring
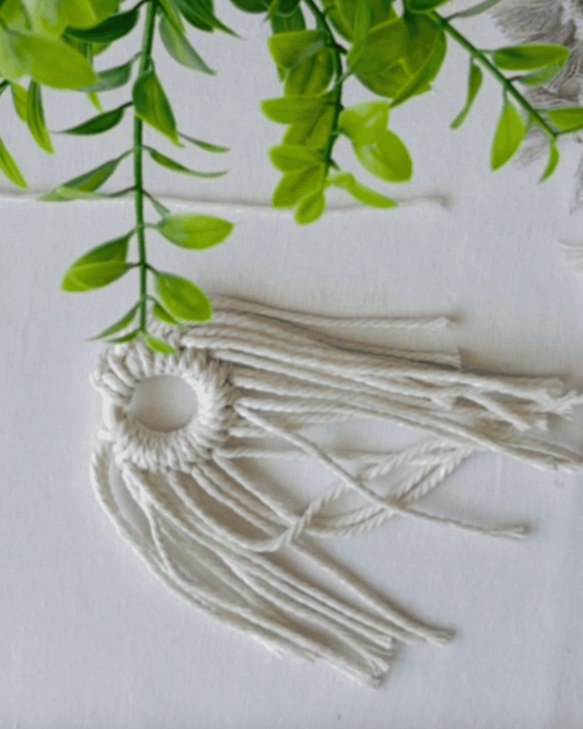
Take each of your 30 cm cords and fold it in half.
Attach them to the 40mm ring using a Lark’s Head Knot.
Repeat this process until you have attached all 15 cords evenly around the ring. You will now have 30 cords hanging.
Repeat: Continue this process until you have created a Square Knot base on five separate cord groups around the ring.
2. Form the Snowflake Arms (Center Structure)
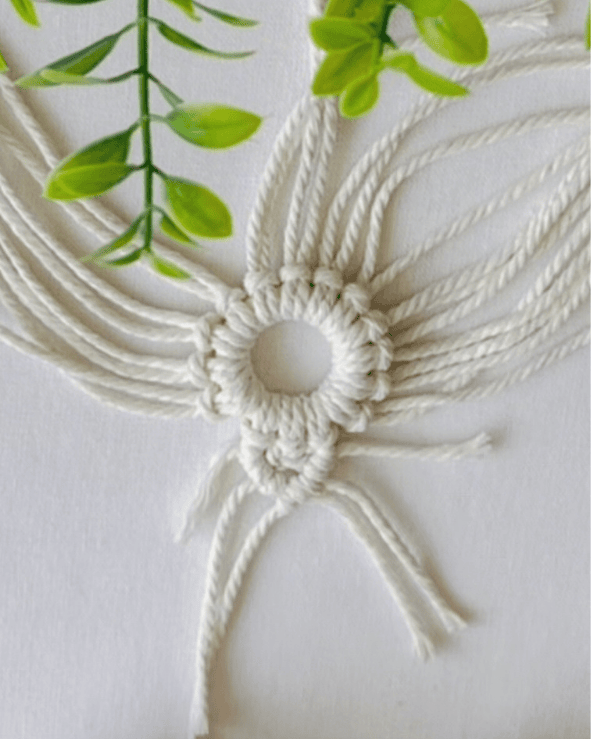
You will be creating five distinct snowflake arms, each using six cords (three pairs).
Arm 1 Base: Count six cords from the left (Cords 1-6). Tie one Square Knot in the center using Cords 2, 3, 4, and 5. Cords 1 and 6 are left loose.
Repeat: Continue this process until you have created a Square Knot base on five separate cord groups around the ring.
3. Shape the Arms (Diagonal Double Half Hitch Knot)
This step creates the V-shape in the center of the arm.
Center Cord: In your first arm, take the cord that is second from the left (Cord 2) and use it as your Holding Cord. Hold it taut and diagonally down and to the right.
Knotting: Take Cord 1 (the outermost cord on the left) and tie a Double Half Hitch Knot around the Holding Cord (Cord 2).
Repeat: Take Cord 3, and tie another Double Half Hitch Knot around the Holding Cord (Cord 2).
Mirror the V: Now, switch to the right side of the arm. Take the cord that is fifth from the left (Cord 5) and use it as your new Holding Cord. Hold it taut and diagonally down and to the left to meet the first line.
Complete the V: Tie a Double Half Hitch Knot with Cord 6 around Cord 5, and a Double Half Hitch Knot with Cord 4 around Cord 5.
Close the V: Tie one final Double Half Hitch Knot where the two Holding Cords (Cord 2 and Cord 5) cross in the middle.
Repeat: Complete this entire Diagonal Half Hitch V-Shaping process on all five snowflake arms.
4. Fringe the Snowflake
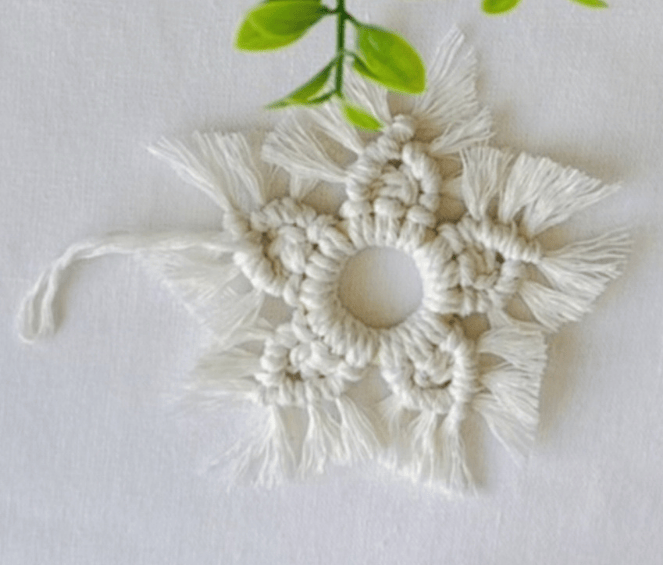
Once you have all five arms completed, gently comb out the ends of all the cords using your fringe comb. This unravels the twists and creates a beautiful, soft, snowy fringe.
Trim the ends of all your cords to your desired length. A good starting point is about 5 cm from the bottom of the last knot.
5. Add the Hanger
Take your 40 cm cord and fold it in half.
Use a simple knot to attach it to the top of the ring, creating your hanging loop.
With these simple steps, your Macrame Snowflake Ornament is ready to add a beautiful, handmade touch to your decor.
Creative Ways to Use Your Snowflakes
These macrame snowflakes are incredibly versatile and perfect for adding a handmade, boho touch to your holiday decor.
On the Christmas Tree: Hang them directly on your tree to add cozy, bohemian charm to your festive decorations.
As Gift Toppers: Tie one onto a beautifully wrapped present for a high-end, handmade touch. The recipient can then use it as an ornament.
Mini Festive Decor: Hang them from a window, string a few together for a garland, or even use one as a stylish car charm.
Watch the Full Tutorial
I've got you covered with a full video tutorial for visual learners. Watch my step-by-step YouTube tutorial to see the knots in action.
Shop Finished Ornaments
No Time to Craft? If you love the look of these handcrafted items but need it delivered fast, you can buy the Handmade Macrame Snowflake Ornament directly from the shop right now!
Enjoying our macramé tutorials? Consider supporting us!

